Choose stitch dimensions and fabric size
Decide how many stitches to use and how large the finished design will be.
Steps
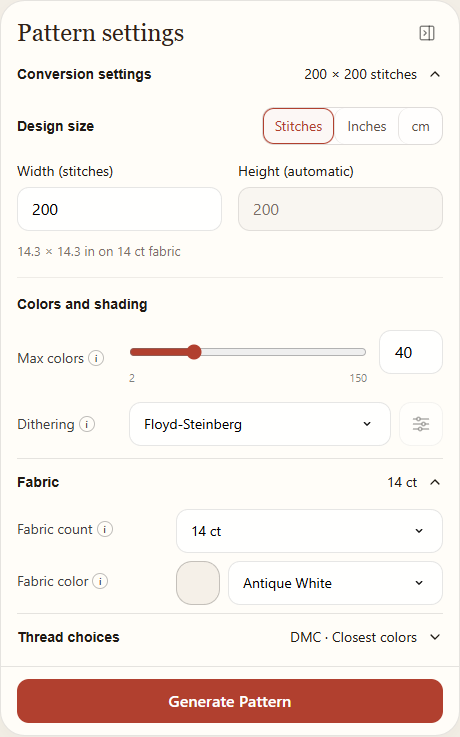
- On Create, select your picture and open Conversion settings. Under Design size, choose Stitches, Inches, or cm.
- Enter the width. The height is calculated automatically from the picture's shape, so the image is not stretched. A round crop uses a diameter; an oval uses width.
- Open Fabric and choose the count printed on your fabric package, such as 14 ct. Check the size shown below the width and height.
- Choose Generate Pattern, or Regenerate Pattern if you already made a preview. For a Pro-only method on Free, the button offers Preview Pro result or Regenerate preview instead.
What do the numbers mean?
Stitch width and height count the squares in the chart. More squares can capture more detail, but also mean more stitches to make. Fabric count is the number of stitches per inch; a higher count makes the same chart smaller on the fabric.
For example, a 70-stitch-wide chart on 14-count fabric is about 5 inches wide (70 ÷ 14). The displayed size is the stitched design, not the size of fabric to cut.
Leave extra fabric around all sides for your hoop, frame, or finishing method. Measure that margin separately.
Stitches or physical units?
Choose Stitches when you know the chart width. Choose Inches or cm when you have a target finished width. The app converts it to whole stitches, so the final measurement may be rounded. If you change fabric count while working in physical units, the stitch width can change to keep the intended physical size.
Photo height follows the image. For a blank canvas you can enter both width and height separately.
If a size is unavailable
Each side of a pattern must be between 16 and 600 stitches. With a very wide or tall photo, the automatic height may fall outside that range. Adjust the width or crop the picture to a less extreme shape, then check the size message before generating.